Piping specifications
A piping specification defines the parts and methods that are allowed in a project. Here, "method" refers to a standard process such as bending parameters. Often the contents of the specification are defined in P&I diagrams—according to maximum pressure, service, temperature, corrosion allowance, and so on.
Each definition associates a short code and one or two nominal sizes with either part identification or method identification.
- Part identification and nominal sizes are required to access a particular part size of a catalog part.
- Method identifications are used mostly to select a manufacturing process for bending pipes, or to make branches as stub-ins. Methods are also used to refer to extra materials needed in flanged connections, such as gaskets, bolts, and nuts.
Note: You can also use so-called additional lookup dimensions when part size is searched from a catalog part. This means that one short code – key size combination can map to more than one catalog size, differentiated only by the additional lookup dimensions. See Use additional lookup dimensions.
Each entry in the specification is hierarchically positioned, based on its component class and functional code. Component classes describe the way components can be inserted into the model. It is recommended to arrange the hierarchies so that the items that are used most often are listed first.
Component class, functional code, and one or two nominal sizes—together with additional lookup dimensions, if defined—form a unique key to some catalog size or method.
An easy way to make a new specification is to make a copy of an existing specification and use that as a template.
Defining a piping specification
Use the specification editor to create a new piping specification or to edit an existing one.
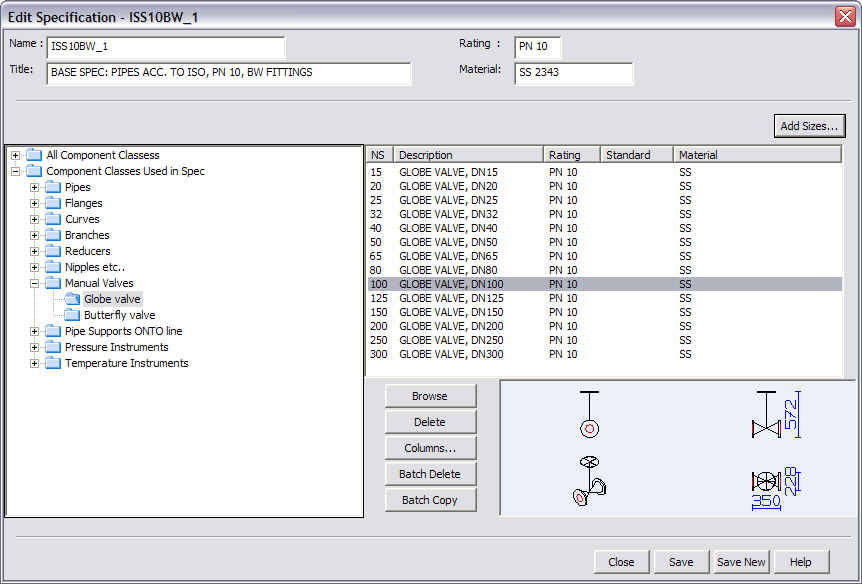
The specification editor window includes the following fields and buttons.
|
Button/Field |
Description |
|---|---|
|
Name |
Name of the specification. The name must not contain special characters or spaces. Specification name can be displayed for example in line labels. |
|
Title |
Description of the specification. |
|
Minimum rating for the parts in the specification, so that you cannot select parts with a lower rating to the specification. Note that only numerical data is read from this field, and unit identifier strings will be ignored. |
|
|
Default material of the parts. The real material is defined for catalog parts. |
|
|
Add parts and sizes to the selected component class/functional code. |
|
|
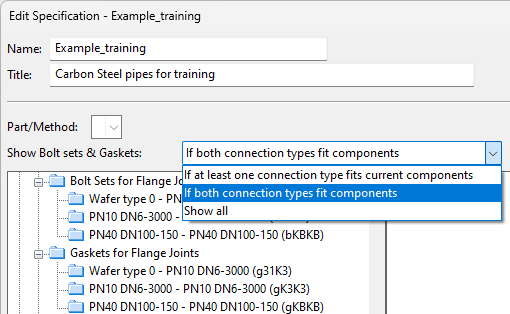
To define bolt sets or gaskets for flanged joints, you can filter the lists of connection type pairs based on whether one or both of the connection types are used by the components already in the specification.
|
|
|
Browse |
Starts the object browser and displays the selected part size and catalog part. |
|
Delete |
Deletes the selected part size from the specification. |
|
Columns |
Opens the Edit View Columns dialog for selecting which columns to show in the specification editor. |
|
Batch Delete |
Opens a dialog for selecting from which specifications to delete the currently selected part sizes. |
|
Batch Copy |
Opens a dialog for selecting to which specifications to copy the currently selected part sizes. |
|
Close |
Closes the specification editor. |
|
Save |
Saves the specification. If you have edited its name, you are prompted to confirm the renaming. |
|
Save New |
Saves a new instance of the specification. (Edit the specification name before saving.) |
Prerequisites
-
To include free bends, stub-in branches, or particular insulation types in the specification, the available nominal sizes must be defined in the Nominal size sets configuration object.
Do the following:
-
Open the Project Environment dialog, and browse to [library or project] > Specifications > Piping Specifications.
-
Do one of the following:
-
Start creating a new specification by selecting New > Piping Specification. The Create New Specification dialog opens.
-
Open an existing specification by double-clicking the specification. The Edit Specification dialog opens.
-
-
Define the following information:
-
Name – The name of the specification.
-
Title – The description of the specification.
-
Rating – The pressure–temperature rating of the pipes defined in the specification.
-
Material – The material of the pipes defined in the specification.
-
-
Add parts and part sizes to the specification:
-
Do one of the following:
-
To add a new part to the specification, expand the Available Component Classes tree and select the part from the tree.
-
To change the allowed part sizes of a part that is already in the specification, expand the Component Classes Used in Spec tree and select the part from the tree.
-
-
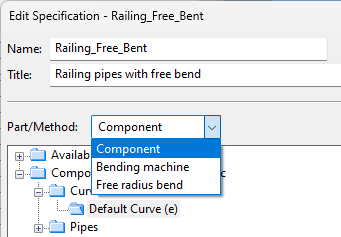
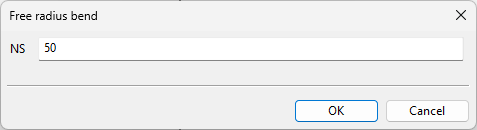
Select an implementation type from the Part/Method field, if applicable. For example, you can set "Default Curve" to be implemented as "Component", "Bending machine", or "Free radius bend".
-
Select a nominal size set from the Run Sizes field, if applicable.
-
Select a filtering method for bolt sets and gaskets, if applicable.
-
Click Add Sizes.
-
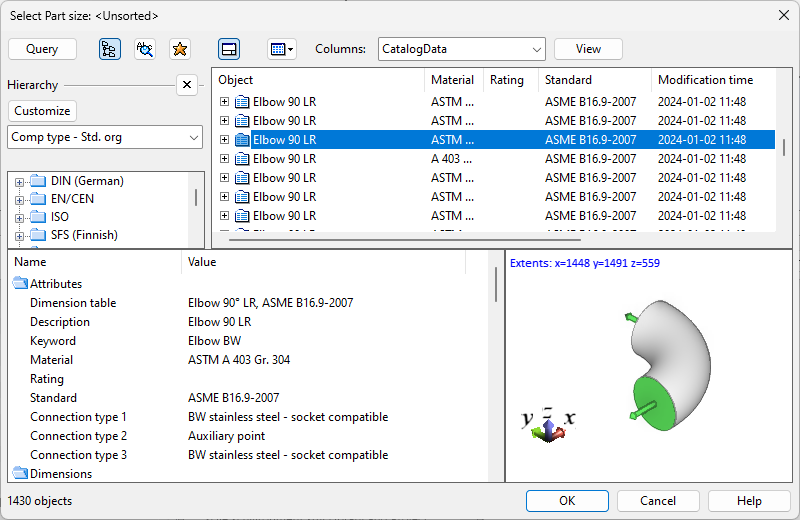
If the object browser dialog opens, select the required catalog part, and click OK.
Note: You can select several different catalog parts to one functional code, if needed. The number of nominal sizes and the geometry type must be correct, and the number in the rating field of the catalog part must be greater than or equal to the rating value in the specification.
-
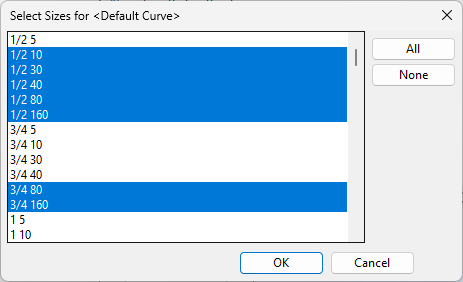
If the part size list opens, select which part sizes the specification should support, and click OK.
-
If a dialog opens for defining the nominal size value manually, type the required value and click OK.
-
-
-
Do one of the following:
-
Click Save if you are creating a new specification or if you are updating an existing specification and want to overwrite the existing version.
-
Click Save New if you are updating an existing specification and want to save the new version with a new name.
-
-
Click Close to exit the specification editor.